Nextcloud a Ubuntu 16.04
Requisits
- Máquina Ubuntu Server 16.04
- LAMP
- Podeu trobar com instal·lar-ho a LAMP a Ubuntu 16.04
- Aquestes llibreries addicionals de php:
apt-get install php-bz2 php-curl php-gd php-imagick php-intl php-mbstring php-xml php-zip
Instalació
Anem a la pàgina oficial on surten els releases i agafem la versió que nosaltres volguem, en aquest cas utilitzarem la versió 11.03
#cd /tmp/
#curl -LO https://download.nextcloud.com/server/releases/nextcloud-11.0.3.tar.bz2
Descomprimim nextcloud a la carpeta /var/www
#tar -C /var/www -xvjf nextcloud-11.0.3.tar.bz2
Creem un script per indicar els permisos i propietaris dels fitxers de NextCloud
#nano nextcloud.sh
#!/bin/bash
ocpath='/var/www/nextcloud' # si la  ruta es un altre diferent a la que hem seguit, haurem de canviar-la en aquest paràmetre.
htuser='www-data'
htgroup='www-data'
rootuser='root'

printf "Creating possible missing Directories\n"
mkdir -p $ocpath/data
mkdir -p $ocpath/assets
mkdir -p $ocpath/updater

printf "chmod Files and Directories\n"
find ${ocpath}/ -type f -print0 | xargs -0 chmod 0640
find ${ocpath}/ -type d -print0 | xargs -0 chmod 0750
chmod 755 ${ocpath}

printf "chown Directories\n"
chown -R ${rootuser}:${htgroup} ${ocpath}/
chown -R ${htuser}:${htgroup} ${ocpath}/apps/
chown -R ${htuser}:${htgroup} ${ocpath}/assets/
chown -R ${htuser}:${htgroup} ${ocpath}/config/
chown -R ${htuser}:${htgroup} ${ocpath}/data/
chown -R ${htuser}:${htgroup} ${ocpath}/themes/
chown -R ${htuser}:${htgroup} ${ocpath}/updater/

chmod +x ${ocpath}/occ

printf "chmod/chown .htaccess\n"
if [ -f ${ocpath}/.htaccess ]
 then
  chmod 0644 ${ocpath}/.htaccess
  chown ${rootuser}:${htgroup} ${ocpath}/.htaccess
fi
if [ -f ${ocpath}/data/.htaccess ]
 then
  chmod 0644 ${ocpath}/data/.htaccess
  chown ${rootuser}:${htgroup} ${ocpath}/data/.htaccess
fi
L'executem:
#bash nextcloud.sh
Creating possible missing Directories
chmod Files and Directories
chown Directories
chmod/chown .htaccess
Creem un host virtual per accedir a nextcloud via http:
- nano /etc/apache2/sites-available/nextcloud.conf
Alias /nextcloud "/var/www/nextcloud/"
<Directory /var/www/nextcloud/>
   Options +FollowSymlinks
   AllowOverride All
   <IfModule mod_dav.c>
       Dav off
   </IfModule>
   SetEnv HOME /var/www/nextcloud
   SetEnv HTTP_HOME /var/www/nextcloud
</Directory>
Guardem l'arxiu i activem el site:
#a2ensite nextcloud
To activate the new configuration, you need to run:
service apache2 reload
Activem també el mòdul rewrite d'Apache2, necessari per NextCloud
#a2enmod rewrite
Enabling module rewrite.
To activate the new configuration, you need to run:
 service apache2 restart

Crear la base de dades
Entrem a mysql amb
#mysql --user root --password
Creem la database nextcloud on s'emmagatzemaran les dades del nostre servei:
mysql> CREATE DATABASE nextcloud;
Query OK, 1 row affected (0,03 sec)
Ara crearem un usuari i li atorgarem permisos d'administrador a totes les taules dins de la base de dades creada anteriorment, tot amb una comanda.
- Si mysql és al mateix servidor que NextCloud
#mysql -u root -p
mysql > GRANT ALL ON nextcloud.* to 'nextcloud'@'localhost' IDENTIFIED BY 'password';
mysql > FLUSH PRIVILEGES;
- Si mysql és a un servidor diferent que NextCloud
#mysql -u root -p
mysql >GRANT ALL ON nextcloud.* to 'nextcloud'@'ip.nextcloud' IDENTIFIED BY 'password';
mysql >FLUSH PRIVILEGES;
- IMPORTANT Comentar la línea "bind-address = 127.0.0.1" al servidor mysql per permetre les connexions remotes.
- NOMÉS PER FER PROVES accedir amb l'usuari nextcloud des de qualsevol màquina:
#mysql -u root -p
mysql >GRANT ALL ON nextcloud.* to 'nextcloud'@'%' IDENTIFIED BY 'password';
mysql > FLUSH PRIVILEGES;
Configurar NextCloud
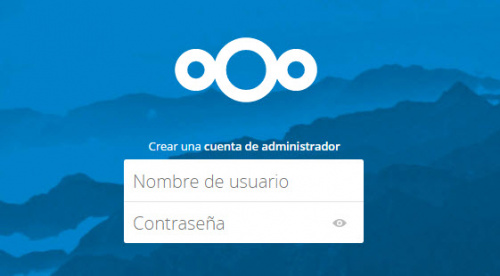
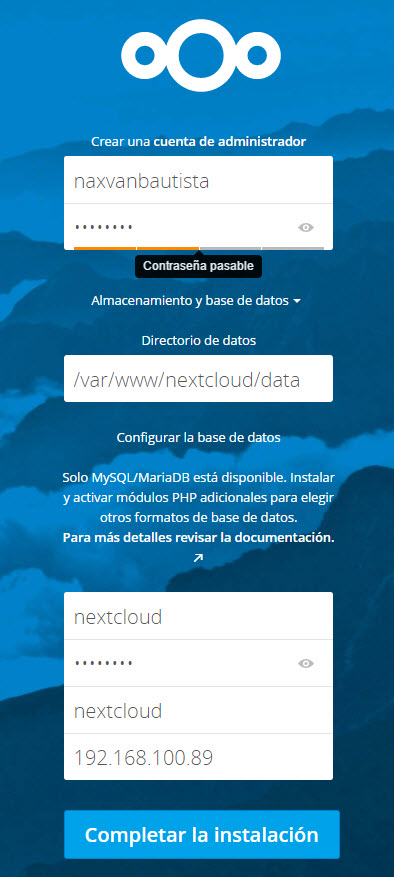
Com hem dit abans, accedim a nextcloud via:
http://la.vostre.ip/nextcloud
Afegim la nostre configuració, si la teva base de dades és al mateix servidor que nextcloud, a l'últim camp nomès farà falta escriure localhost

